
Stretch-mas Day 5: Hip Flexor Stretch
On the fifth day of Christmas, my PT gave to me – the hip flexor stretch! Today’s stretch is perfect if you spend a lot of time sitting or have stiffness when standing and walking.
What are Hip Flexors?
Muscles included in the hip flexors include the Iliacus, Psoas, Pectineus, Rectus Femoris, and Sartorius. When you bend at your hip, these muscles contract to create this motion! These muscles engage when you kick your leg out, sit down, bend over, or bring your knees to your chest.
When you sit for long periods of time, these muscles remain contracted. After sitting for a while, you may notice some tightness in the front of your hips when you walk. That’s where the hip flexor stretch comes in! This stretch will help relieve stiffness and increase the range of motion in your hips.
Step-By-Step Guide
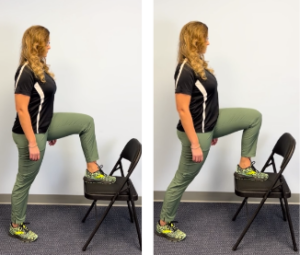
If you have a staircase, this exercise can be performed at the bottom of the staircase. Otherwise, grab a sturdy chair and place it in front of you with the seat facing towards you. To begin, stand a few feet from your surface with your feet shoulder width apart. Keep your core tight by sucking in your belly.
Next, you’ll want to place one foot on top of your chair or stairs (we recommend aiming for the second or third step from the bottom). Note: whatever leg you put on top of your surface, you’ll feel the stretch in the opposite leg.
Now, you start the stretch by leaning forward towards your elevated leg. Keeping your back leg flat on the floor, you should notice a slight stretch through the leg. This shouldn’t be painful; you should feel a stretch. Hold this stretch for 10-30 seconds. If you have a lot of tightness, it may be difficult to hold this position for longer periods of time when first starting out.
After holding the stretch, you can return to the starting position and repeat on the same side or switch the positions of your legs to stretch the opposite side. Repeat this up to 10 times.
Progressions
Progression 1 – Lateral Rotation
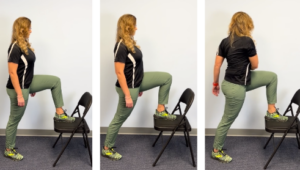
If you tried this and found it a bit too easy for your taste, you can progress the exercise by adding a twist.
Once you are in the stretching position, twist your torso away from your grounded leg while you continue to hold the stretch.
Progression 2 – Side Bends
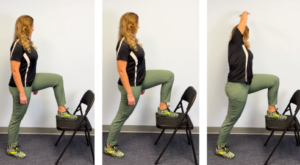
After a while, the first progression may feel too easy. At that point, you can increase the stretch further by adding a side-stretching component. Start by performing the original stretch.
Once you are in position, take the arm on your stretching side (the side with your leg on the ground), and reach above and over your body.
Final Notes
If you’ve been a patient of ours, chances are you’ve either done this stretch before, or seen someone do this stretch before! We love this stretch because it can help reduce pain in so many of the things you do on a daily basis. Try doing this stretch every day for a week, and let us know how you feel!
Ready for more? Review the previous stretches or come back tomorrow for the quad stretch!
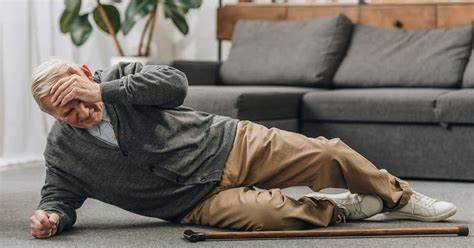
All of us will fall during our lifetimes. For older adults, falls can more easily result in serious and potentially life-threatening injuries. The…
A fall can result in unwanted outcomes, including injury, loss of independence, and a decreased ability to do the things that are most important to…